4. User Interface and Interaction
1. Select Gripper IP
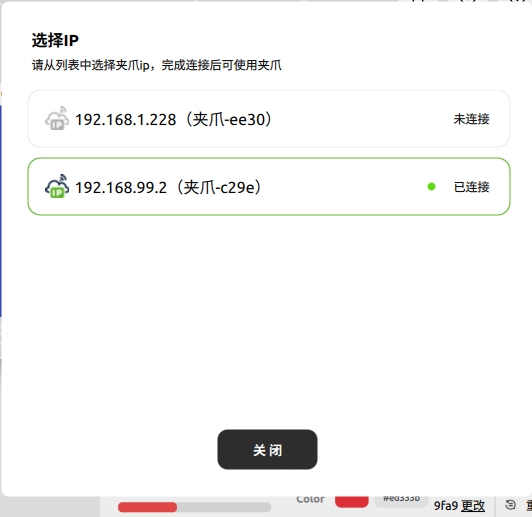
Figure 1: Gripper IP Selection Area
Under the “Change” option in the current Gripper IP Selection Area, you can select all gripper IPs within the local area network to connect to grippers with different IPs.
Sensor Status Prompt
![]() : Indicates the device is online
: Indicates the device is online
![]() : Indicates the device is offline
: Indicates the device is offline
![]() : Indicates a sensor abnormality; hovering the mouse will display the error message (sensor config file reading failed).
: Indicates a sensor abnormality; hovering the mouse will display the error message (sensor config file reading failed).
After unplugging/plugging in the gripper, you need to click  to reconnect and scan the sensor.
Tactile Information Display
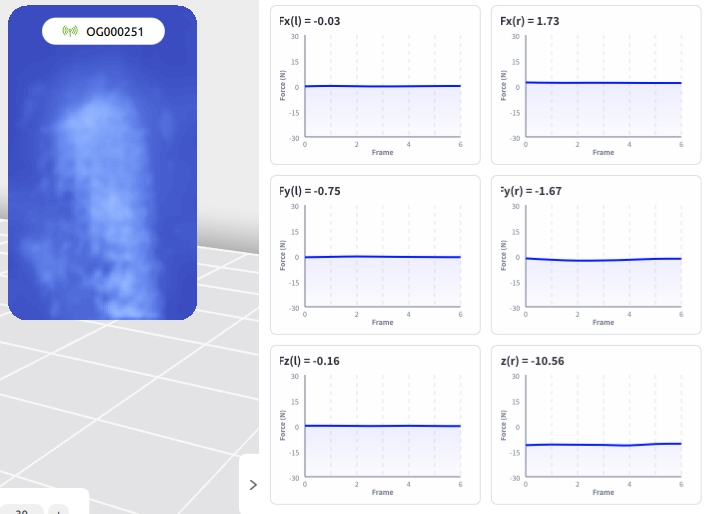
Figure 2: Tactile Information Display
The gripper sensor can detect tactile sensations and generate corresponding images, while displaying multi-dimensional force data in real time, facilitating accurate monitoring and control of the gripper’s status and force-bearing conditions.
When the tactile image information is distorted or sensor data is stuck, click the  calibration button directly below under no-load conditions to recalibrate the sensor and refresh the display.
2. Gripper Sensor Configuration Area
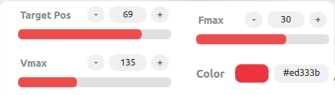
Figure 3: Gripper Configuration Area
 Move to Target Position: Click to move the sensor to the target position
 Set Sensor Maximum Speed: Allows adjustment of the sensor’s movement speed
 Set Sensor Maximum Contact Force: Allows adjustment of the contact force between the sensor and the object
 Set Gripper Status Light Color: Click the color button to set the color of the status light
3. Toolbar
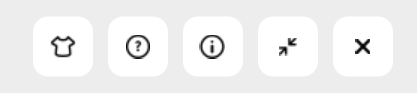
Figure 4: Toolbar
 Theme Switch: Click to select the interface theme
 Help: Open help documentation and FAQ
 About: Display application information
 Minimize: Minimize the application to the background
 Exit: Close the current application