I. Disassembly and Assembly Instructions for Flexible Replacement Parts
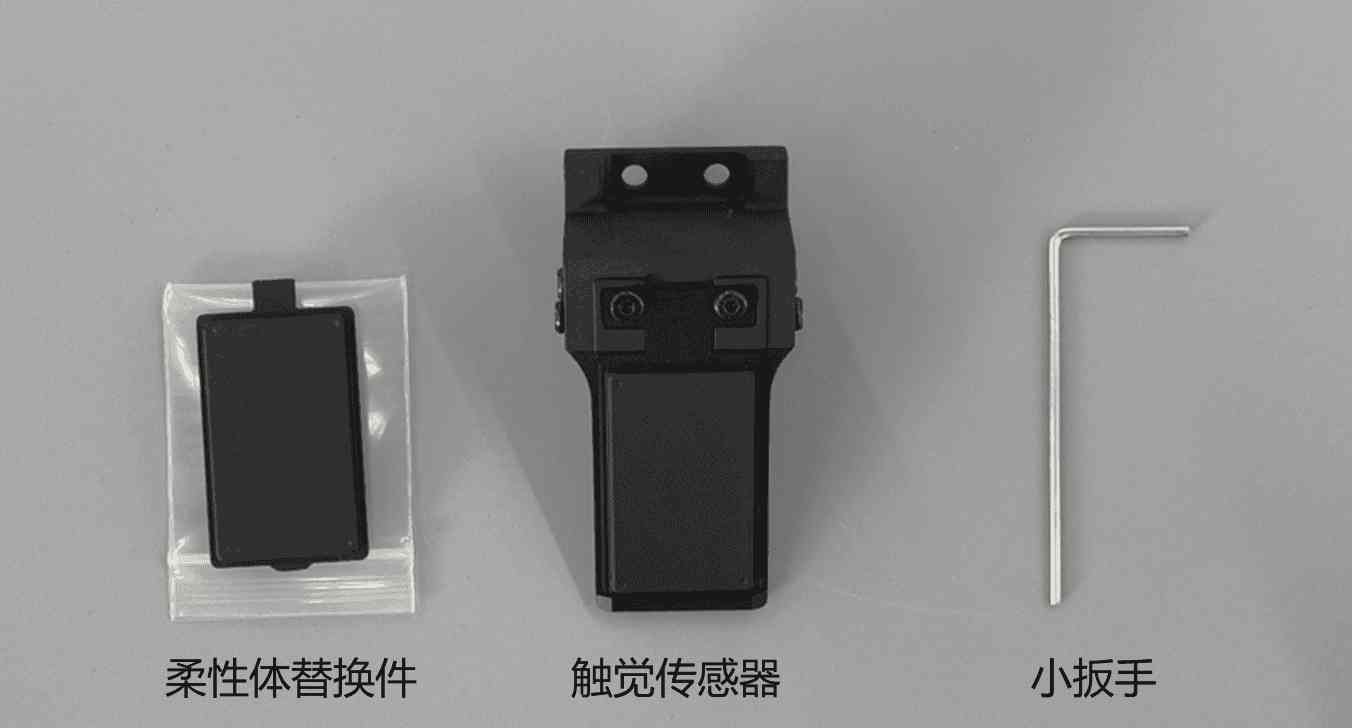
1. Tool List
柔性替换件×1
小扳手/电动螺丝刀(M2批头)×1
2. Replacement Instructions for Flexible Replacement Parts
STEP1: As shown in Figure 1, use a small wrench to remove the 2 M2 screws on the sensor sheet metal and take off the sheet metal part.
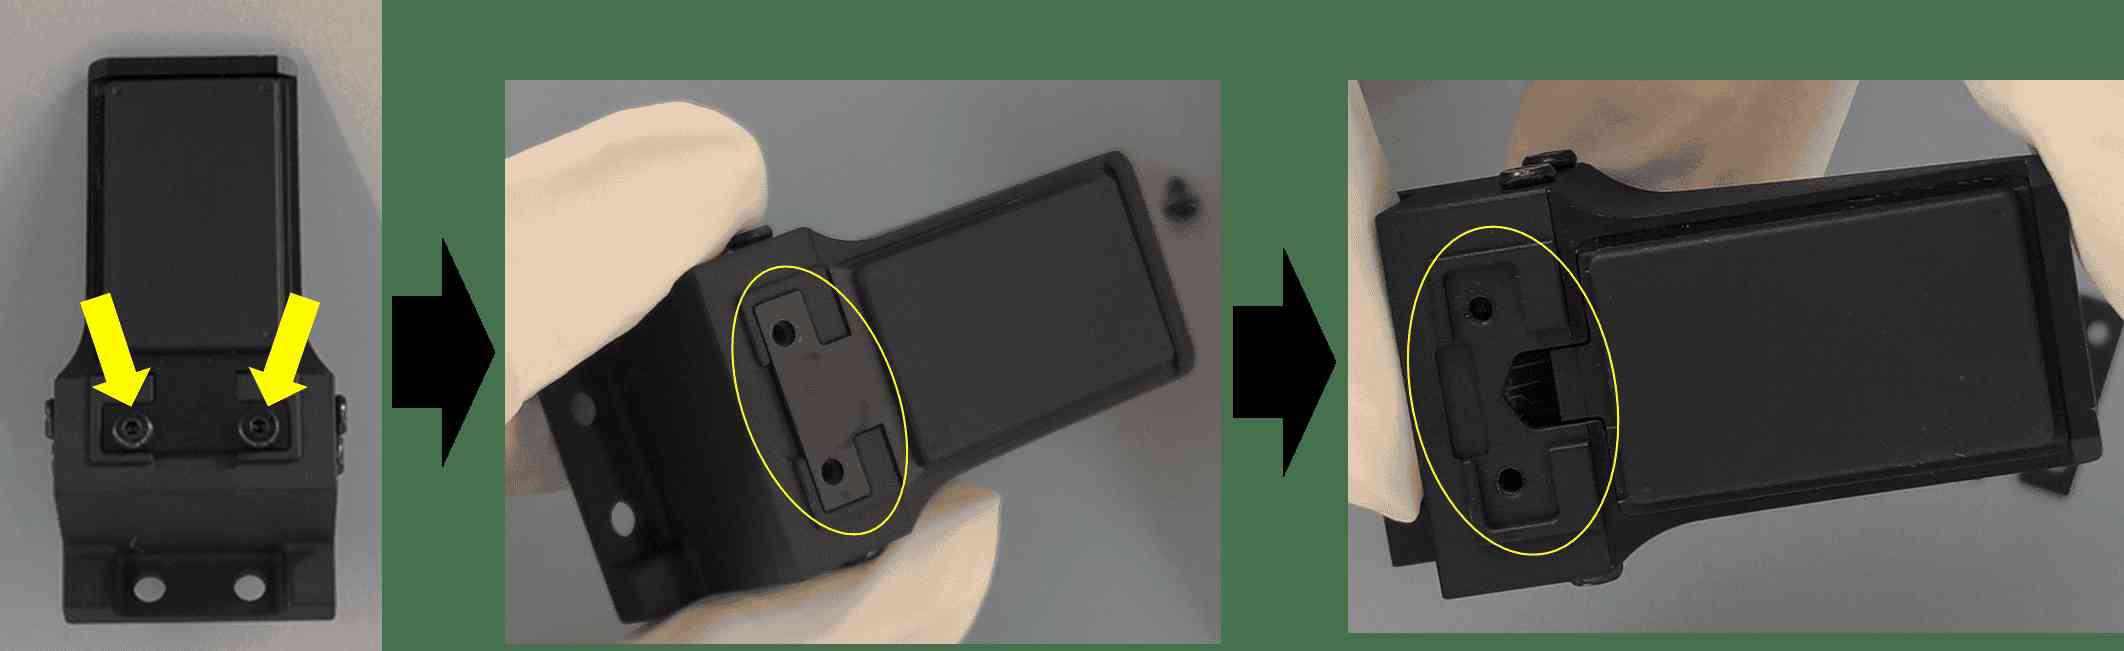
Figure 1
STEP2: As shown in Figure 2, use a small wrench to gently pry open the buckle and lift up the flexible replacement part to remove it.
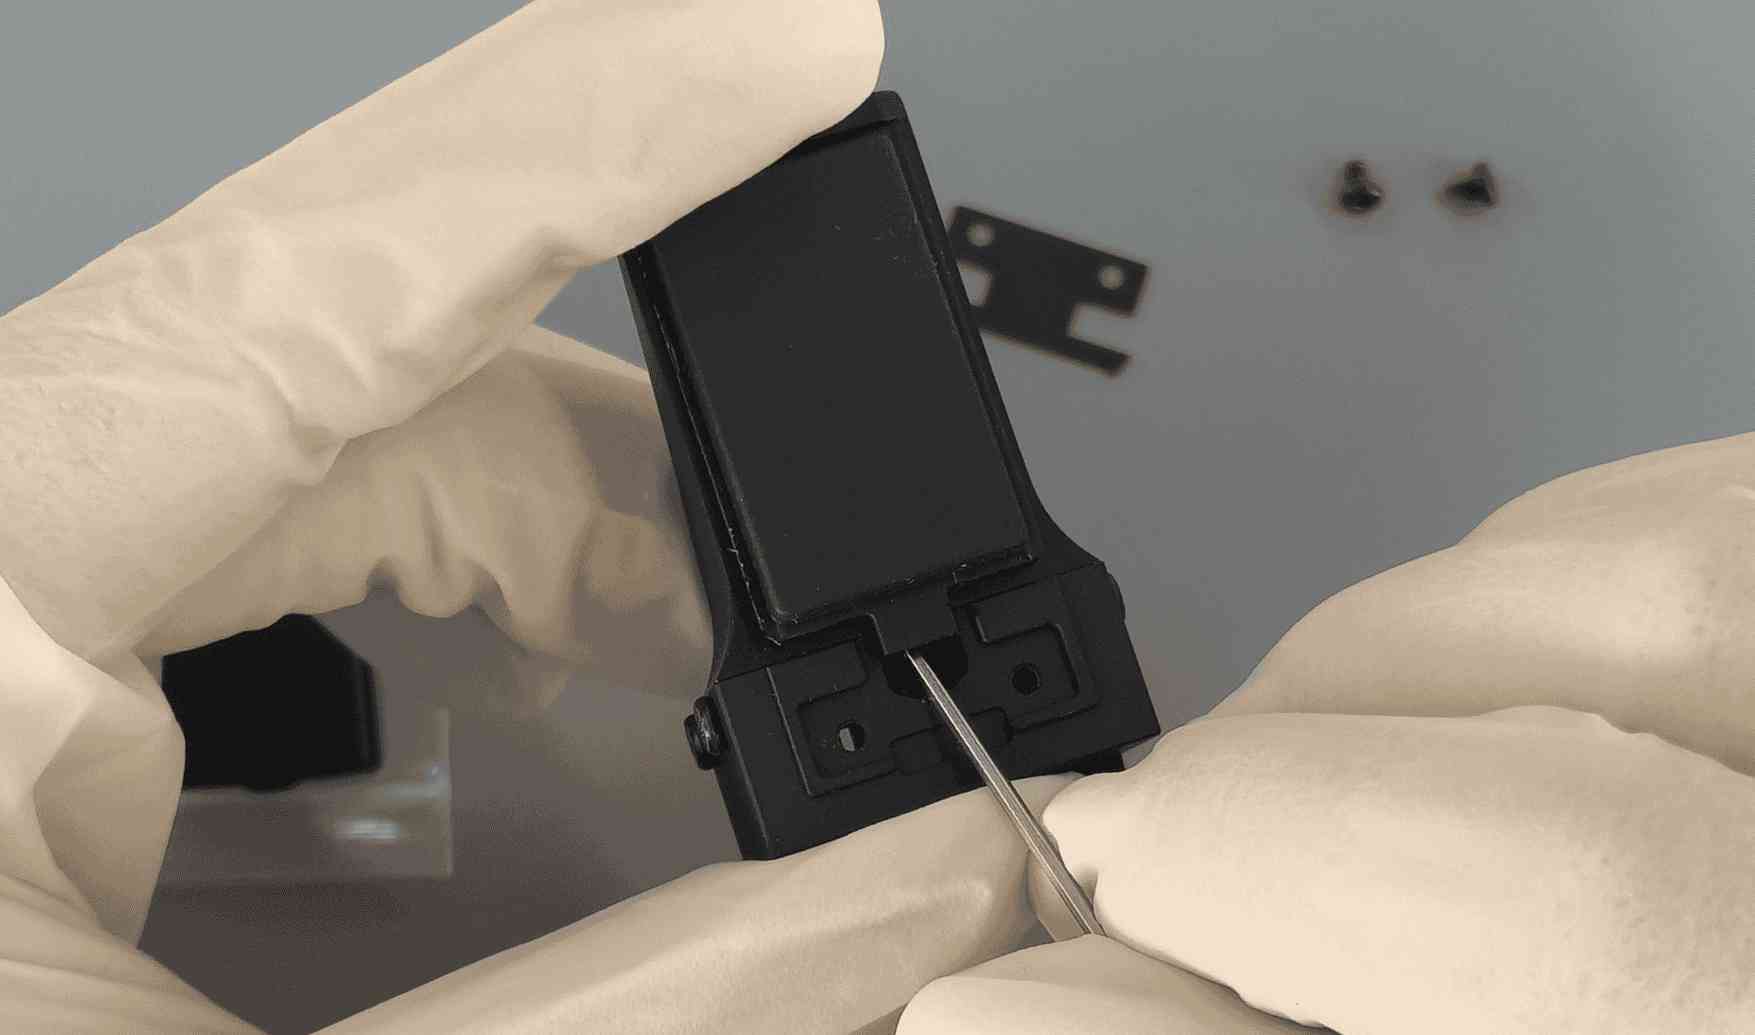
Figure 2
STEP3: As shown in Figure 3, check the optical surface of the replacement part and the internal lens of the sensor. If there is dust, first use air blowing to remove the dust, then gently wipe with a special lens cleaning cloth to avoid scratching the surface.
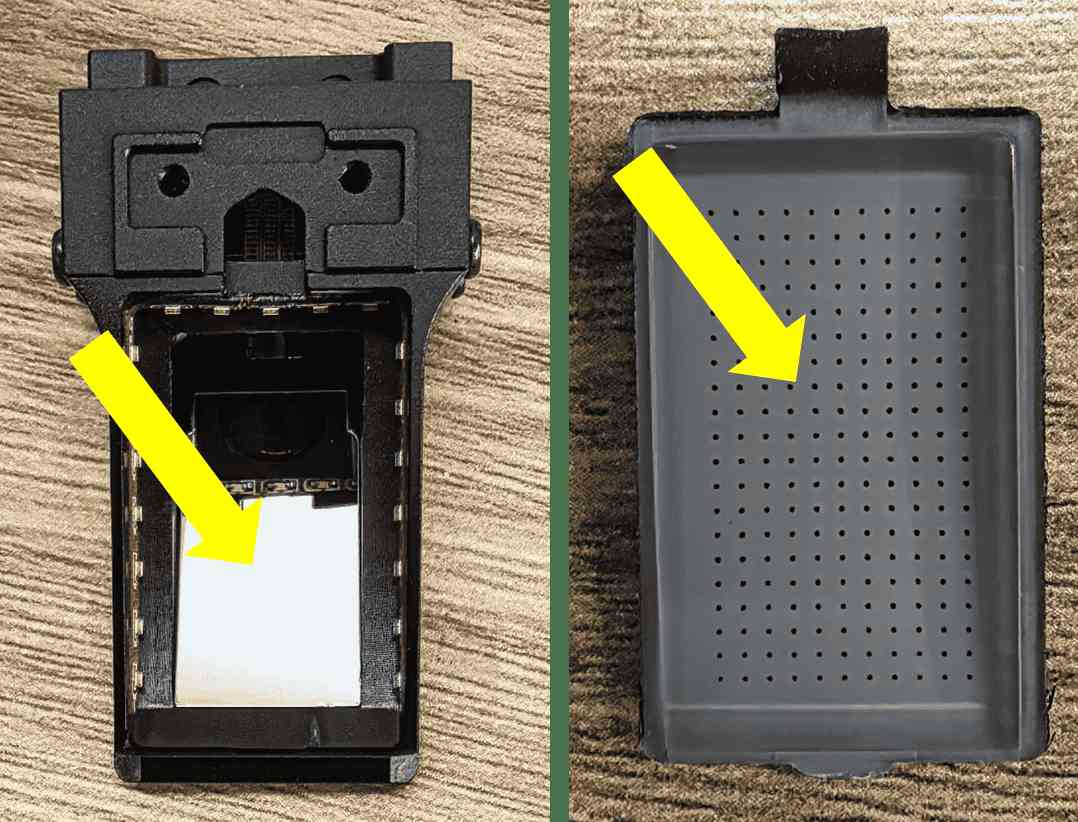
Figure 3
STEP4: As shown in Figure 4, replace the replacement part. Please strictly follow the operation sequence from 1 to 4; incorrect sequence may cause permanent damage to the internal components of the sensor!
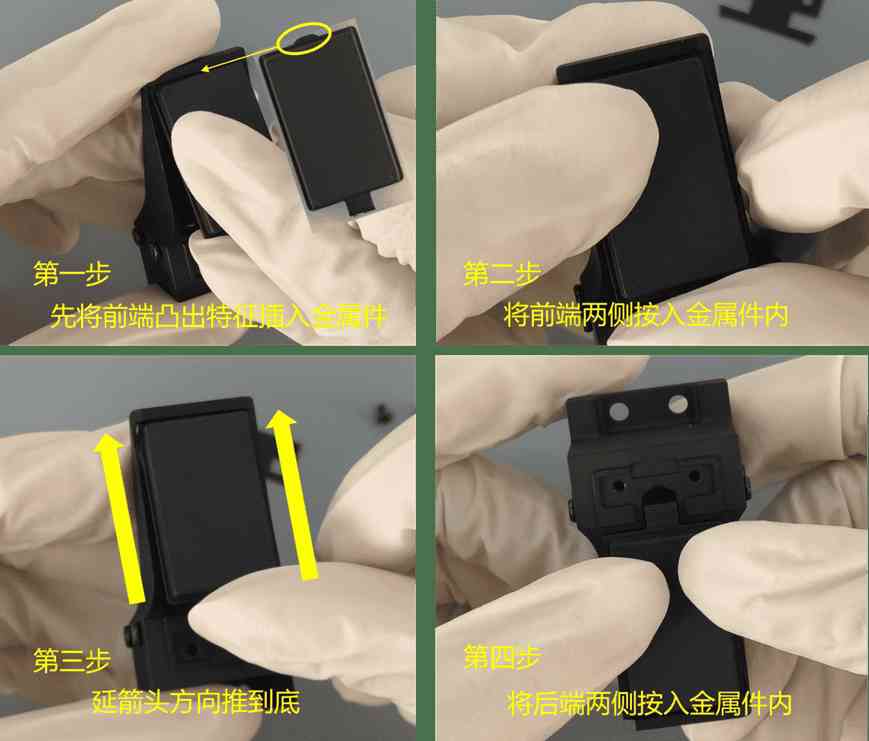
Figure 4
STEP5: As shown in Figure 5, install the sheet metal and tighten the screws; the steps are the reverse of STEP1.
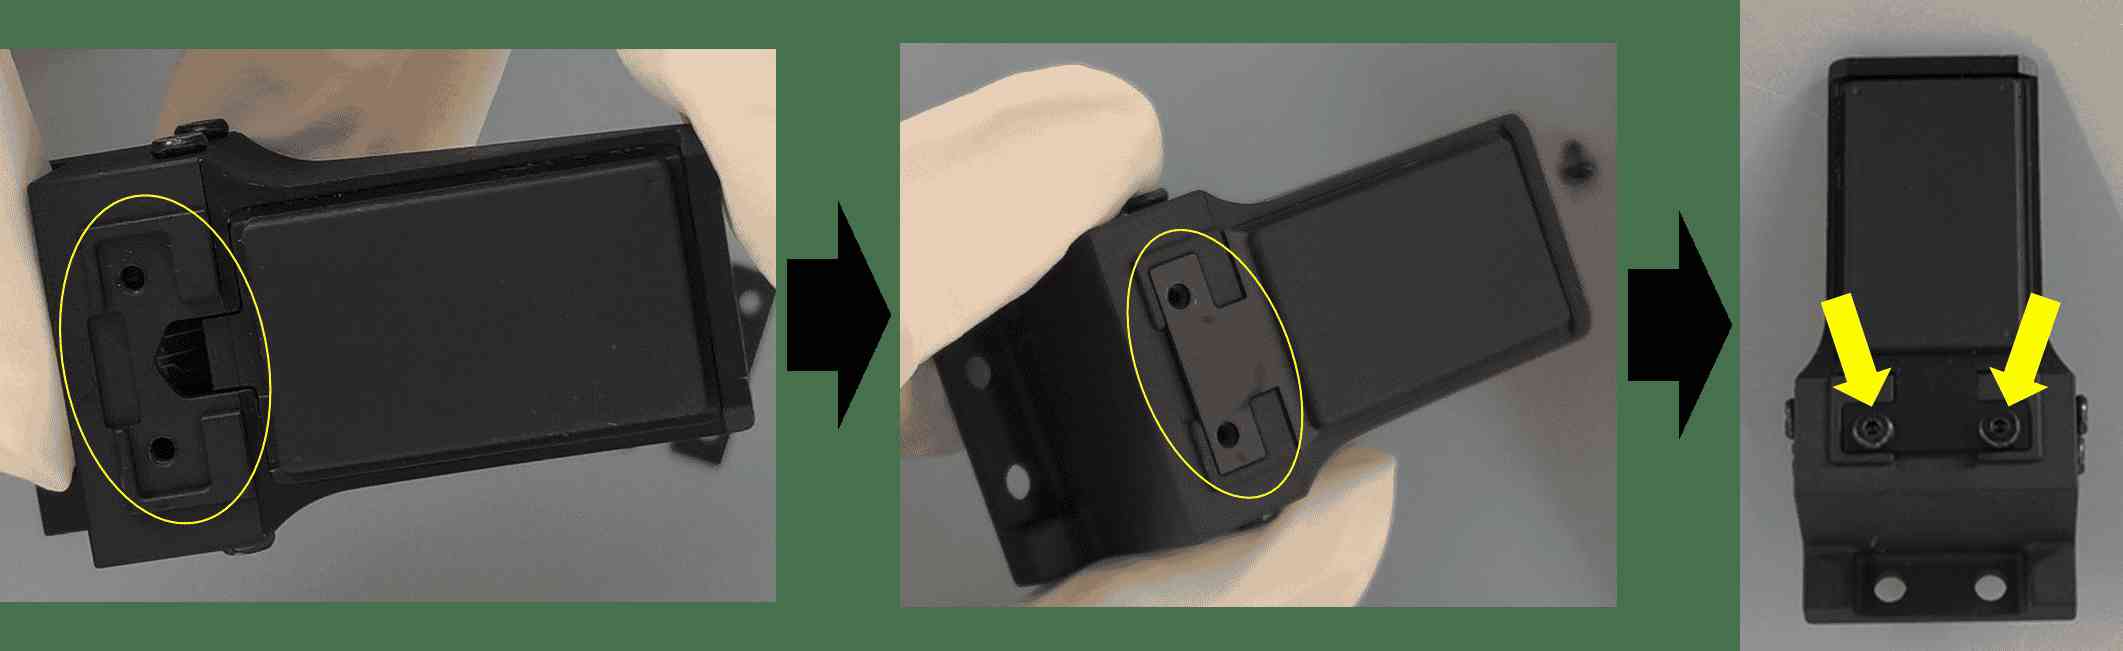
Figure 5